How to Deploy Nuxt.js SSR App to Digital Ocean
Posted 5 years ago by Ryan Dhungel
Category: SSR Deployment Digital Ocean Nuxt js Server Node Github Git
Viewed 38919 times
Estimated read time: 14 minutes
In this tutorial, I will guide you step by step on How to Deploy Nuxt.js to Digital Ocean so that you can push your local Nuxt.js project to the cloud. We will be using Digital Ocean as our clound hosting provider. Digital Ocean is the best choice in my opinion because its cheap, extremly fast, and it lets you have minimum of 10 droplets(server environments). You can configure them to your need such as for PHP, Ruby, Node or Python apps.
This tutorial is 100% practical. I will cover all the stpes from pushing your project to github/bitbucket. So that you can make commits into your project in local computer, push them to github/bitbucket and pull those changes is digital ocean servers. I will also cover generating and pairing ssh keys and everything else. So lets begin.
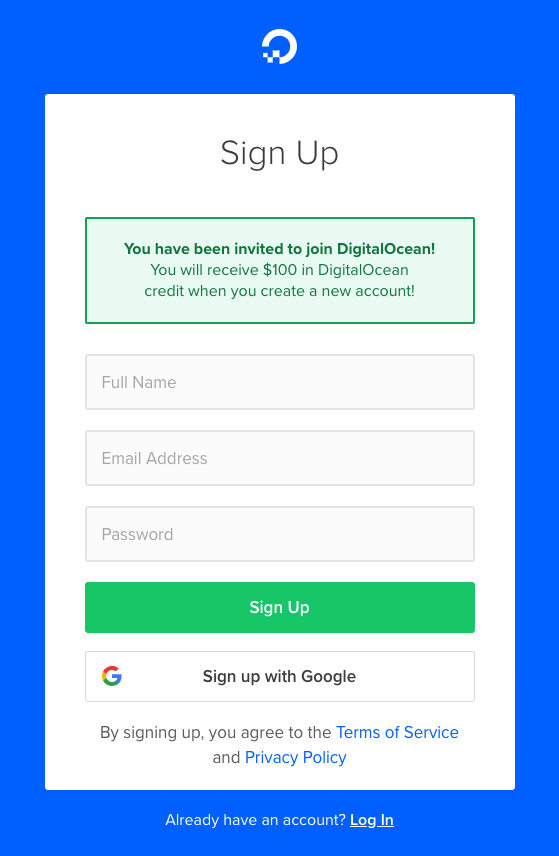
Sign up to Digital Ocean
- First you need to signup to Digital Ocean
- Use this link to signup
- https://m.do.co/c/90857e82d426
- And navigate to signup page to https://cloud.digitalocean.com digital ocean
- If you use the above link you will get. between $10 to $100 credit applied in your account
- Once your account is ready, you can create a new droplet
- In your digital ocean account, on top you will see a button to create a new droplet
- From the options choose ubuntu
- And choose $5 monthly package or bigger one if you want bigger - You can always change it later
- Choose datacenter - New York or anywhere near your target audience
- All the way down, update the hostname that looks something like this - ubuntu-s-1vcpu-1gb-nyc1-01
- Change it to your liking. lets call it ccnuxt (this is the name I will be using throughtout this tutorial. you might name it differently so please dont foreget to update)
- Hit create
- Now check your email, you will receive an email about your new droplet
- This Email contains important info such as IP address, login credentials etc
- You will be able to access your site using the IP address (
http://104.248.57.186/) in the browser just like you would access a site usingdomain.com - It's great because your site is live and you can add a domain name anytime later using Digital Ocean dashboard. Nice and easy
Accessing Digital Ocean Droplet as a root user
- Open your terminal and try to login
- Use
sshfollowed by theIPaddress you got in email from digital ocean - Do the following:
ssh [email protected]- It will ask you - Are you sure you want to continue connecting (yes/no)?
- Type yes and hit enter
- Type password - the one you got in your email, you can copy paste
- Then again it will ask you for current password - (current) UNIX password:
- Paste the same password one more time
- Now it asks you to enter new password
- So type new password and make sure to remember it
- Once done hit enter. it will ask you to retype once more
- Once done, you will be logged into your droplet like so:
root@ccnuxt:~#- To exit type exit and hit enter
- To login again
ssh [email protected]- Use password and then you will be logged in
Generate SSH key for Enhanced Security
- Use ssh key to login and also change root user for enhanced security
- Make sure you are logged in from the terminal
- Open new terminal tab and type - I am using ccnuxtserver. Feel free to name is different.
ssh-keygen -t rsa -b 4096 -C "ccnuxt"- Then it will show you this:
Generating public/private rsa key pair.Enter file in which to save the key (/Users/kaloraat/.ssh/id_rsa):- Copy that link and append the name that you gave to your ssh keygen like so:
/Users/kaloraat/.ssh/id_ccnuxt- Then it will ask you for this:
Enter passphrase (empty for no passphrase): - Its not necessary because we will be using the ssh key to login and it will be accessible only from your computer, so just hit enter a few times
- Ok lets check out our ssh key
- Its in the root directory in a hidden folder called .ssh
- Run the following command in terminal
cd ~/.sshls your new ssh key will be there- There you will see two versions of the key
id_ccnuxtandid_ccnuxt.pub- The one with
.pubextension is for public services such as github or bitbucket - We will host our codebase on service like github or bitbucket
- It will be pulled in by our server on digital ocean
- While doing that, it will match with private key and the public version to allow access
- Copy the public ssh key in the clipboard like so
cat id_ccnuxt.pub | pbcopy - Now leave this terminal window open, we will come back to it later
Add a new user to replace root user
- Head back to the terminal window where you are logged in to digital ocean
- It is recommended by Digital ocean(and its good for enhaned security too) to restrict root user so lets create a new user to replace root user
- Run the following command
adduser ccnuxt- It will ask:
Enter new UNIX password: - Type password hit enter... do the same with repeat password.
- Make sure you remember the password
- You can just hit enter and not worry about filling full name, number etc
- It will ask - Is the information correct? [Y/n]
- Type
y - Now login as super user
- Run the following code
sudo su ccnuxt - Now its not root, its you - ccnuxt. awesome!
Provide sudo privilege to new user
- But ccnuxt does not have sudo privilege yet.
- So lets exit first
- Then run
exit - Tthen set this ccnuxt user as admin
usermod -aG admin ccnuxt - Now try running
sudo su ccnuxtcdsudo su root - Type the password and hit enter
sudo su ccnuxtll - There you dont see .ssh foler so lets create a directory for ssh
mkdir .sshcd .sshvim authorized_keys - And here also we need to paste the ssh key, the public one with
.pubextension - So go to the other terminal still open and run this command to copy the public key
cat id_ccnuxt.pub | pbcopy - Come back to digital ocean terminal window and paste or use shortcut
command v - Watch out for the beginning words of the key you paste
- Sometimes the begining letters
sshis onlysh- missing very first 's' letter - In that case make sure to use arrows to reach at the beginning of the line and add s
- It should begin like so:
ssh-rsa XXXXXX Then to get out of the edit mode pressESCkey in your keyboard. And then type:wqand hitenterEnter key- Now run exit multiple times to come out of the digital ocean, back to the root of your computer
- Now login with the key using the ccnuxt user
ssh -i ~/.ssh/id_ccnuxt [email protected] - Awesome! we are logged in as ccnuxt
Remove root user's login rights
- But root user still has access to login, lets remove that
sudo vim /etc/ssh/sshd_config - Type password
- Scroll down until you see this line:
PermitRootLogin yes - Change this to no - to be able to edit this file press
ithen make changePermitRootLogin no - Then scroll all the way to the bottom and find this line
PasswordAuthentication yes - Change to this no
PasswordAuthentication no - Then to get out of the edit mode press
ESCkey in your keyboard. And then type:wqand hitenterEnter key - After making any change we need to restart the server to see the changes applied
sudo service ssh restart - Now to exit run
exit - Now we are back on our mac
- Lets try login as root to see if it works - run
ssh [email protected] - You will get an error:
[email protected]: Permission denied (publickey). - Means all our hard work paid off.
lets try login with ccnuxt using sshssh -i ~/.ssh/id_ccnuxt [email protected] - We are logged in
- Now this is the only way to login. awesome!
Install Node and NPM
- Install node and npm
- s
udo apt-get install nodejs npm It will ask you are sure?- type
yto accept and hit enter - go to the root directory
cd
Connect Github or BitBucket Repository to Digital Ocean Server
- Connect your github or bitbucket repository to this server
- I will use bitbucket because there you can host private repository for free whereas in github, you get to host only public repository for free
- The process however will be exactly same
- In your terminal where you are inside the digital ocean server run the create keygen
- use the line below - change to github if you will be using github
ssh-keygen -t rsa -b 4096 -C "bitbucket"- Then you will get this:
- Enter file in which to save the key (/home/ccnuxt/.ssh/id_rsa):
- This path is in server, so we dont need to make any changes
- Just hit enter multiple times
- Then run
cat ~/.ssh/id_rsa.pubcopy the long key you see in terminal- open bitbucker or github webpage
- create a new repository - give it a name and hit create
- There you get the repository link. lets just wait. keep the window open.
- Head over to your existing laravel/nuxt project or create a new one whatever you prefer
- Get inside the project in a new terminal window using cd ccnuxt (ccnuxt is my nuxt project name here) and run
git initgit add .git commit -m "deployment" - now run the command below followed by the url (remove git clone part if its there) you see on the github or bitbucket page while you
- created a new repository
git remote add origin https://[email protected]/kaloraat/ccnuxt.gitgit push -u origin masterok our project is now pushed in bitbucket or github- now we need to add ssh key to our project in bitbucket or github
- first copy the key that we still have in terminal where we are logged into the server
- then either in bitbucket or github - go to settings
- in github, its in Settings > Deploy Keys > Add deploy key (on top right corner)
- then give it any title and paste the key in the key field
- click Add key and you are done (No need to click Allow write access)
- In bitbucket its in setttins > Access keys (left sidebar)
- click on Add key
- give it a name and paste the key in the key box hit save
- now lets test the connection
- back in terminal where we are in server
- run the code below - if using github replace bitbucket with github
ssh -T [email protected] it will say- The authenticity of host 'bitbucket.com (18.205.93.4)' can't be established.
- Are you sure you want to continue connecting (yes/no)?
- type yes and hit enter
- now you see the following:
- This deploy key has read access to the following repositories:
- it means we are doing good!
Clone Project Repository from Github or Bitbucket
- now we can clone this repo to our server
- clone into html folder (add html at the end)
git clone https://[email protected]/kaloraat/ccnuxt.git html - type password if asked - it will be either github or bitbucket password
- lets get inside the project
cd htmlll - here you see all the files and folders of your project
Starting Nuxt
- In the terminal where you are in digital ocean server
- inside html folder
- run
sudo apt-get updatesudo apt-get install nodejsinstall nginxsudo apt-get install nginxgo to the root directorycdcd /etc/nginx/sites-availablels - there you see default file - we need to make some changes
- run
sudo vim default - hit
ito be able to edit this file
Within the server block you should have an existing location / code block. Replace the contents of that block with the
following configuration. If your application is set to listen on a different port, update the highlighted portion
to the correct port number.
 location / {
        proxy_pass http://localhost:3000;
        proxy_http_version 1.1;
        proxy_set_header Upgrade $http_upgrade;
        proxy_set_header Connection 'upgrade';
        proxy_set_header Host $host;
        proxy_cache_bypass $http_upgrade;
    }
}
Write and exit using the following command:
ESC :wq
Make sure you didn't introduce any syntax errors by typing:
sudo nginx -t
You should see the following:
nginx: the configuration file /etc/nginx/nginx.conf syntax is ok
    nginx: configuration file /etc/nginx/nginx.conf test is successful
We are nearly there...
Restart nginx
sudo systemctl restart nginxthencdcd htmlcreate .env filesudo touch .envll- it shows all files including hidden files
vim .env - press
ifor edit mode - write it down
NODE_ENV=production - Then make the changes before exiting by runnning
ESC :wq - Then
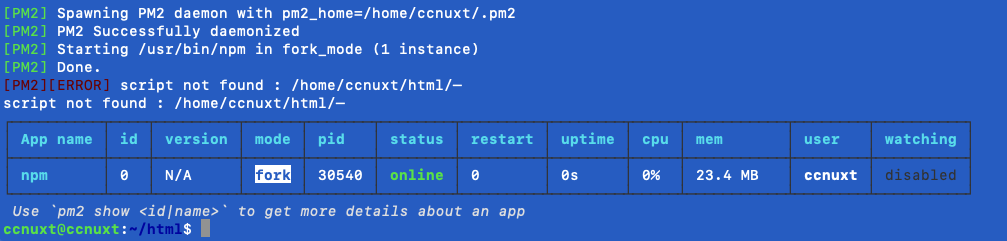
npm installnpm run buildnpm install nuxt (you might not need to run this but i had to) Install PM2 — a node.js process manager.sudo npm install pm2 -g- start project by pm2
pm2 start npm -- start - Process successfully started
Conclusion
Now your app should be running on http://104.248.57.186/ (the ip address you got from digital ocean on email after creating droplet)
Make sure you have used the right urls in your nuxt project because its not running in localhost anymore any API (backend) URL should point to the actual live server not on localhost etc (you know what i mean). you can go ahead and add domain name in digital ocean dashboard later.

Thanks for reading this. I hope you made it. If you come across any issues, leave your comments below. Cheers!